 Home
HomeAll Hacks
Zetec Engine
SPI Engine
General
Suspension
Interior
Exterior
In-Car-Entertainment
Detailing and Cleaning
Maintenance
Miscellaneous
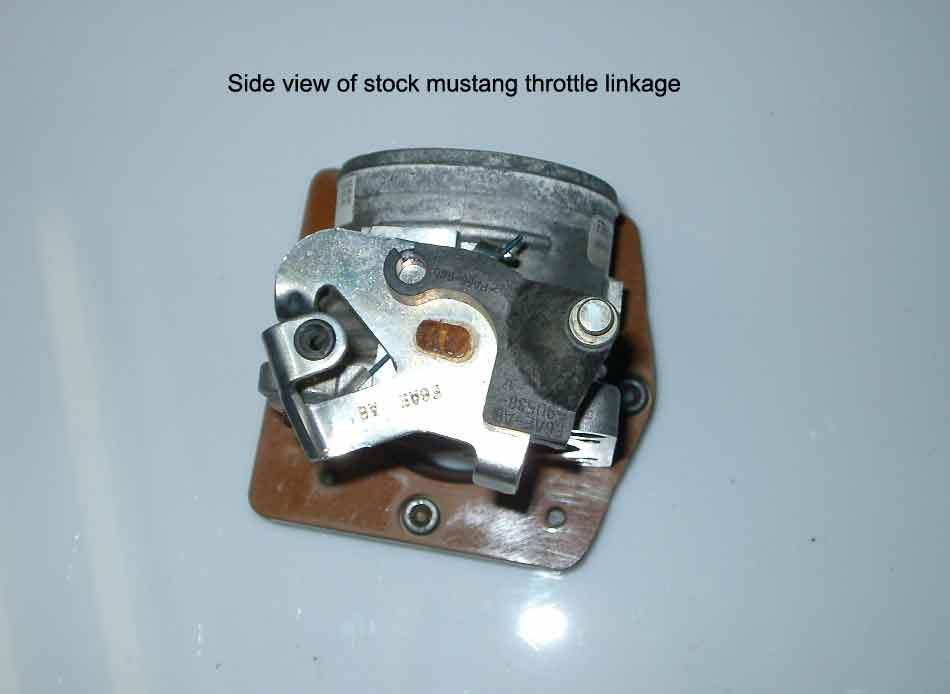
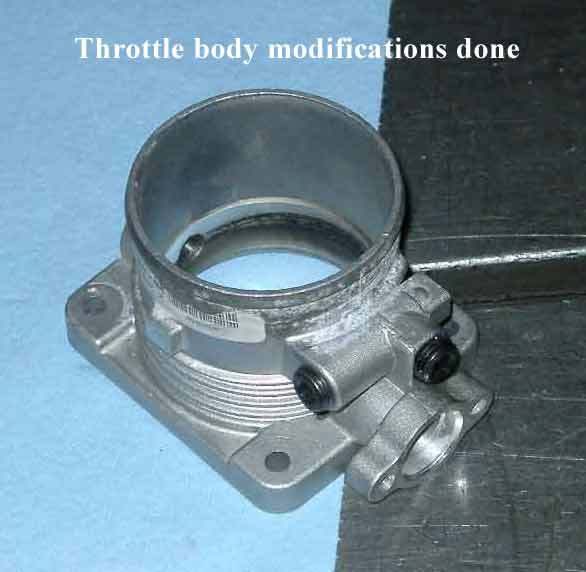
Modifying a Mustang Throttle Body for SPI use
Unless you have a pre-modified mustang throttle body, you'll have to modify it before installing it on your SPI Engine with an adaptor plate. This is how to tweak it.
Time Required:
Unknown
Tools Needed:
Procedure:
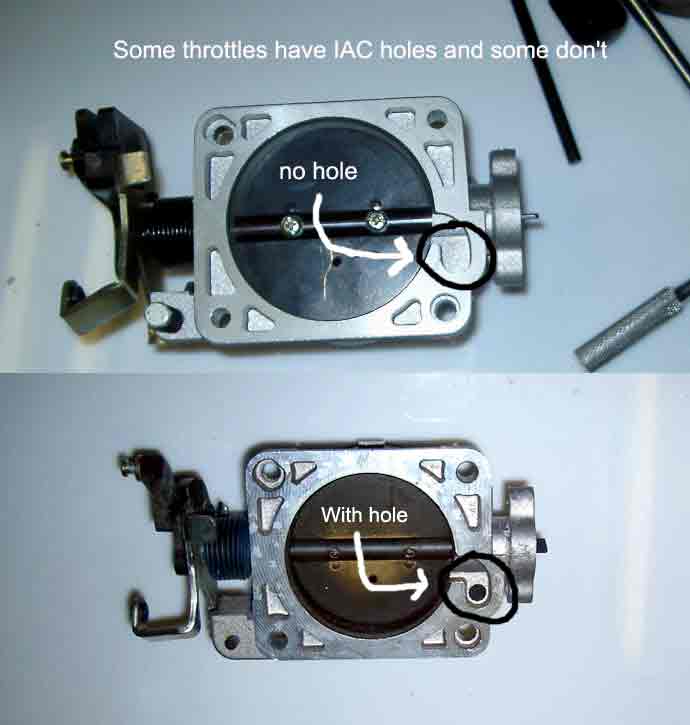
Not all mustang throttles are created equal!! You will need a throttle from a 96' and up Mustang with a 4.6 L engine. This throttle is also available on Crown Victoria's, Cougars and the Grand Marquis with the 4.6L engine. There may be more fitments but I don't know them. From what I've experienced, their are different versions of this throttle available. Some have passages for the IAC air already dilled into the bore and the base of the throttles and some don't. Also, some have a hole in the throttle plate and some don't. The throttle of choice for this mod would be one that has the IAC holes already in it but doesn't have the hole in the throttle plate. All the other throttles will do just fine but will require you to do more work.
Part 1: Modifying the linkage
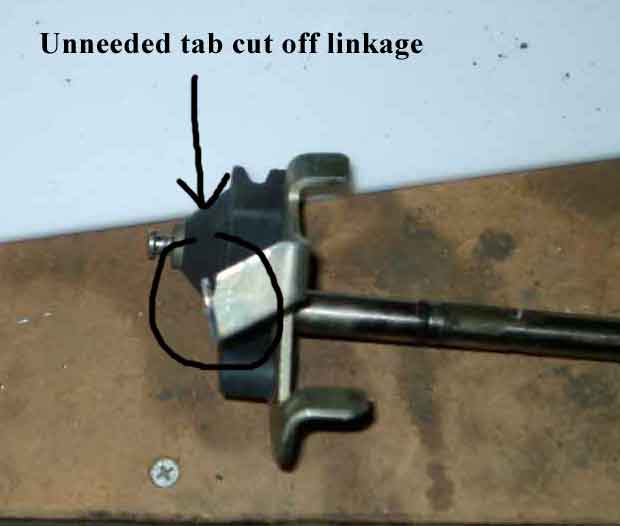
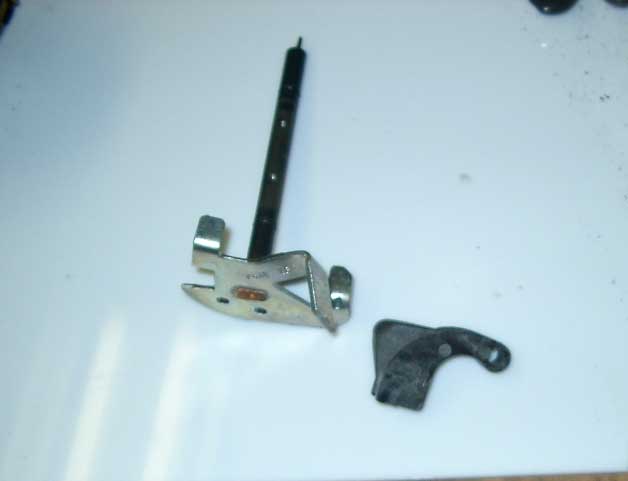
1) You must take the throttle plate out by undoing the two screws in the throttle plate. Open the throttle and pull the plate out from the top of the throttle body. With the plate removed, you can now pull the linkage/throttle rod out. There is no need to take the TPS off just yet. There is a tab that must now be either bent flat or cut-off so you can put the linkage in a vise. There is a pic of the tab cut-off below.
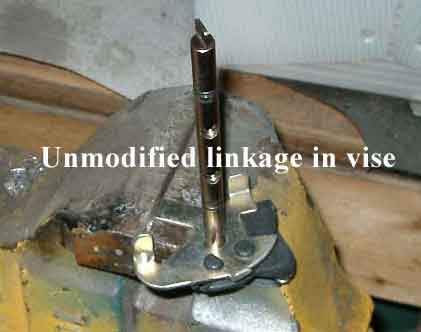
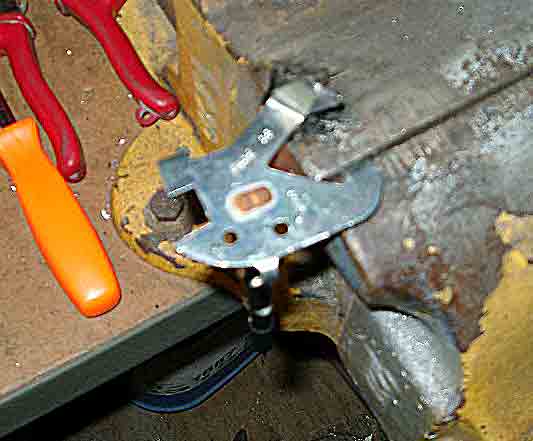
2) Put the linkage in a vise as shown in the picture above and grind away the two plastic bumps with a cut-off wheel. Grind till they are now flush with the metal. You must cut the metal part of the linkage that is between the two red lines in the pic below. You have to use really small cut-off wheels in a Dremel or Roto-Zip to do this. The cut must be parallel to the red lines. Be careful not to cut the throttle bar or the plastic part of the linkage below.

3) Now you can stick a flat-blade screwdriver in between the plastic and the metal and slowly pry the two apart. Now that you have the plastic part off, you must grind away the raised square part of the linkage. You must not grind away the two little round stubs sticking up, just the raised square section were you cut the metal in step 3. This way when the plastic is relocated on the metal part of the linkage it will sit flush. While you have the piece out, make the throttle cable hole bigger by using a 9/32nds drill bit.
4) Those two holes in the metal part of the linkage must be re-drilled in a different position. To do this, place tape on the two holes and then poke holes through the tape so you can see through the holes. Try not to move the tape when poking the holes through so that the hole positions remain accurate.
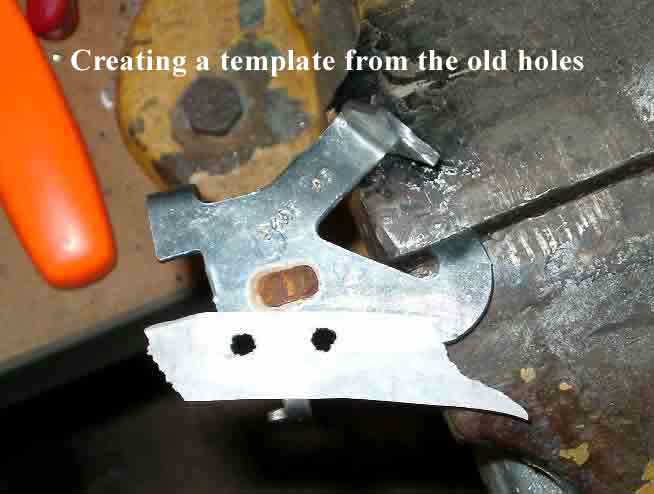
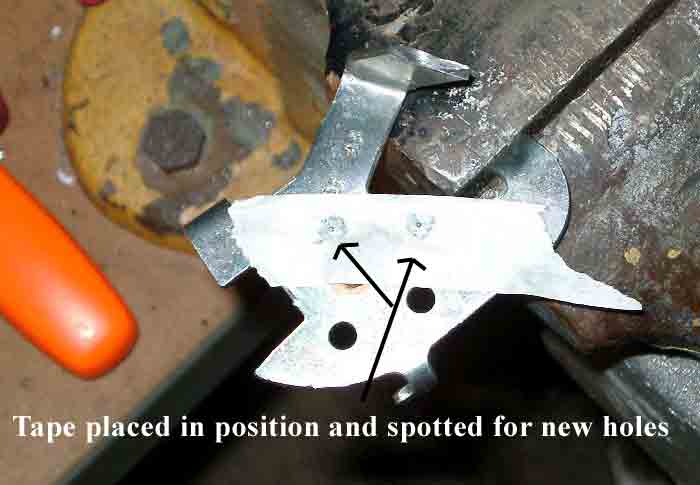
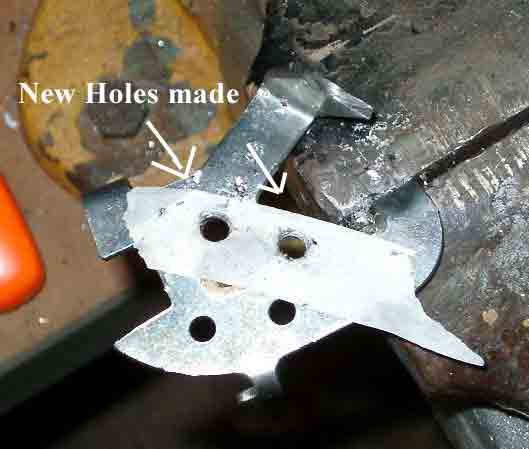
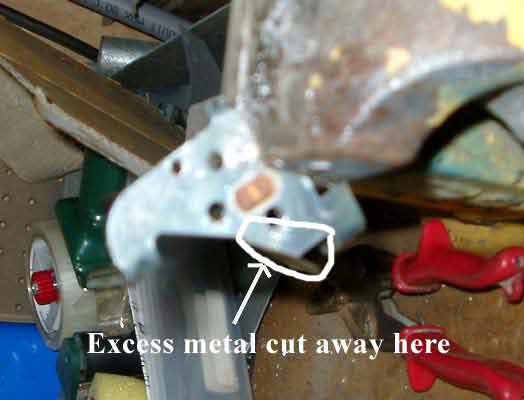
5) As a guide, the hole in the plastic for the accelerator cable should be located on top of the letter "f" in the code that is stamped into the metal. The "f" should be towards the top of the hole. Place the plastic on top of the metal and line up the f, then using that letter as a point of rotation, rotate the plastic till the curve in the plastic lines up with the edge of the rusty center tab and is almost at the edge of one of the old holes (example shown in the fourth pic below). This doesn't have to be too exact... just close enough. Once you get the two pieces lined up. Then using a pencil, trace a line on the metal around the two round stubs. Now pull the tape off and place it over the new traced holes. Put the plastic over the piece and check everything once again before you drill. If it looks good, center punch the holes and drill them out with a 7/32nds drill bit. While you have the linkage in the vise you can cut off the rest of the metal tab that is not going to be used as shown in the third pic below..
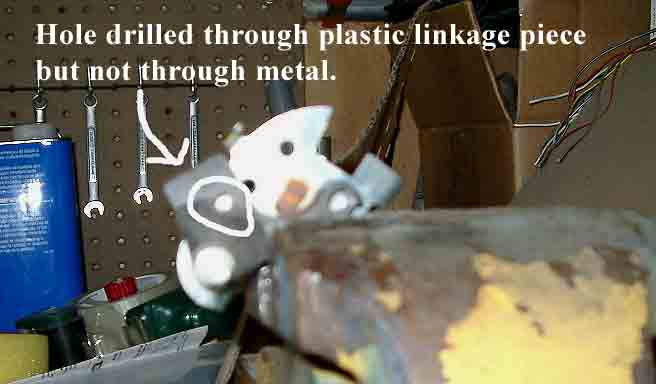
6) As shown in the last picture above, you must drill a 11/64 hole in the plastic were it's circled. Since there is a ramp there it's hard to drill because the drill just walks. You must grind some of the ramp away and make it flat. After you drill the hole, clamp the two pieces together in the vise and spot the hole in the metal using the plastic as a guide. Then take the plastic piece off and drill the hole you spotted all the way through the metal. Now bolt the two pieces together with the 8/32 screw and nut provided. While it's bolted together, cut off the excess length of screw with the cut off wheel.
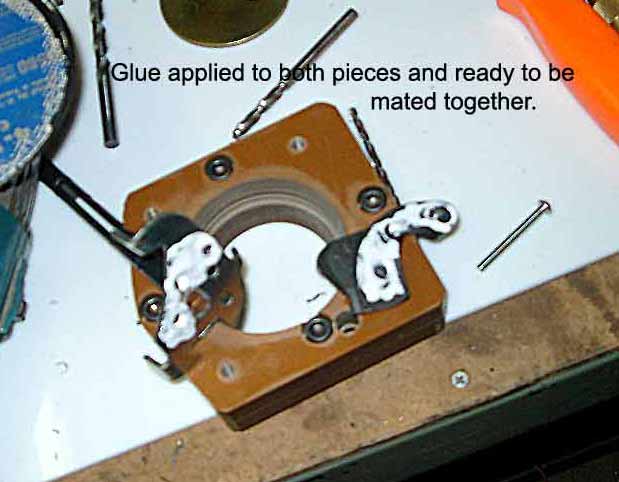
7) Now take it apart again. Clean both surfaces and apply epoxy or some sort of super glue to them. Follow the instructions supplied with the glue you are using and put the two pieces back together when the time is right. Then put a drop of red loctite on the end of the screw and bolt it back together one last time. You are now done modifying the linkage!
Part 2: Modifying the throttle housing
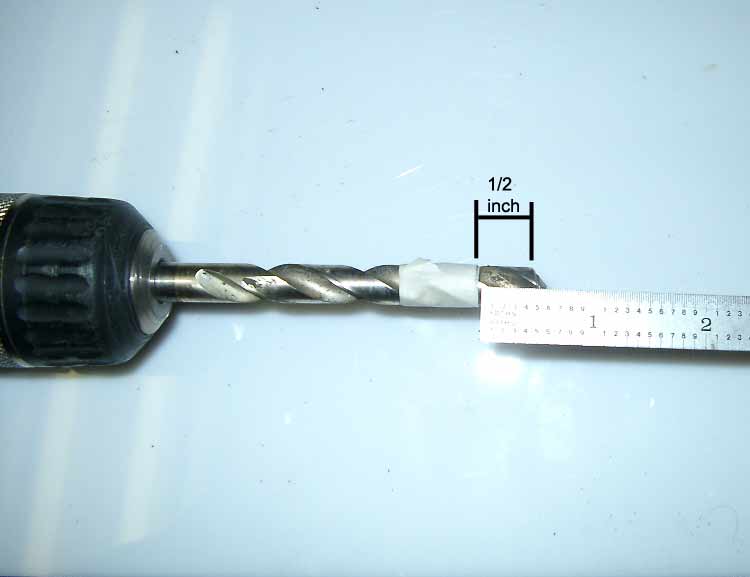
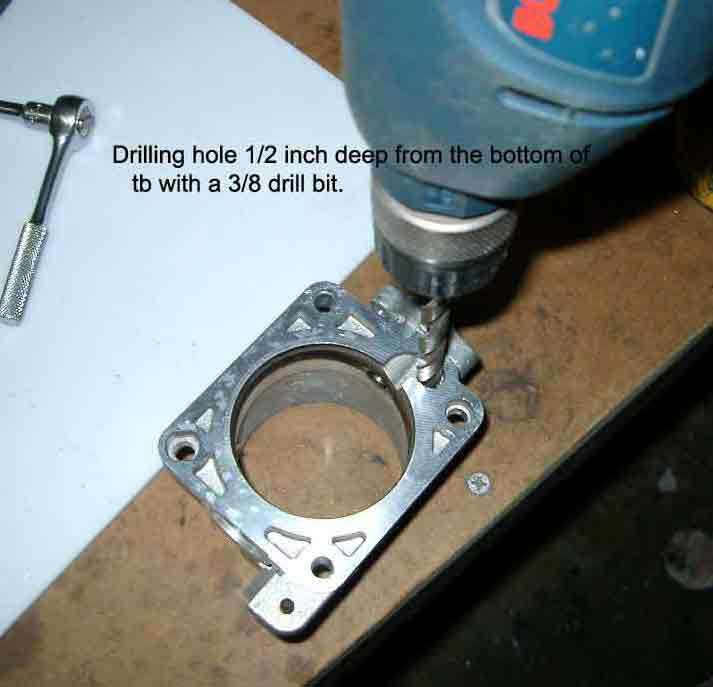
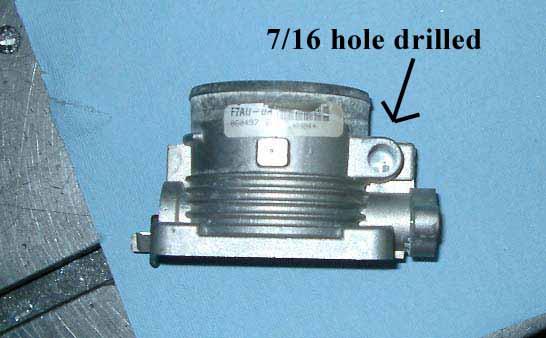
8) Next, you must drill a 3/8 hole a 1/2" deep from the bottom of the throttle body. As I stated in the beginning of this how-to, some have a hole in the bottom and some don't. If you don't have a hole, then just use the edges of the throttle body as a guide for the 3/8 drill bit. If you do, then just make the hole bigger. Before you start drilling, measure 1/2 inch from the edge (not the tip) of the drill and put tape on it or draw a line with a marker. Then drill the hole in the throttle till the tape or the line lines up with the bottom of the throttle. Put the throttle on the adapter and see if it sits flush with the adapter. If it doesn't then take it off and drill a little more.

9) Next you must use a 5/16 bit to drill the previous hole deeper. Using the tape method again, hold the bit up to the side of the throttle and eyeball it so you have about an 1/8 of an inch of material left before you drill through and come out the other side of the throttle. Drill the hole and make sure you don't poke a hole through the other side!
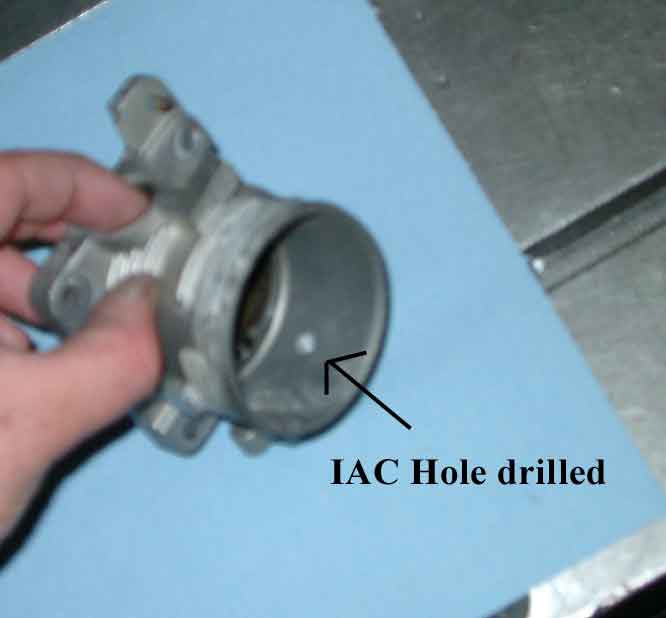
9) If your throttle has an IAC hole already in it then remove the plug in the throttle with a 1/4 in Allen key. Cut the tip of the brass plug off at the threads and put it back in with red Loctite. Don't screw it in very far otherwise it will protrude past the IAC hole you just made and block some of it off. Skip to step 13).
11) If you have no IAC holes in your throttle then you will have to take the TPS sensor off. It is a PITA because they used some sort of thread locker on the threads You can try to take them off but you have to be very careful because the screws strip easily. If you have trouble, you can place a block of wood on top of the throttle and clamp it to a table or workbench with a c-clamp. Now that the throttle is secure...you can put some muscle into it and get those screws and the sensor out.
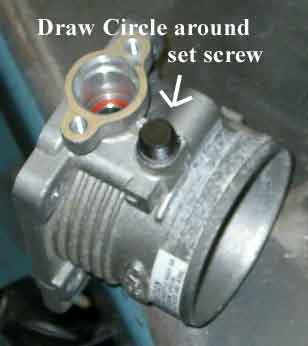
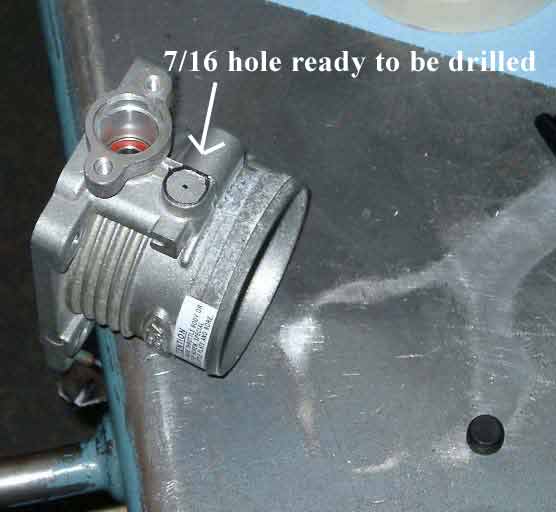
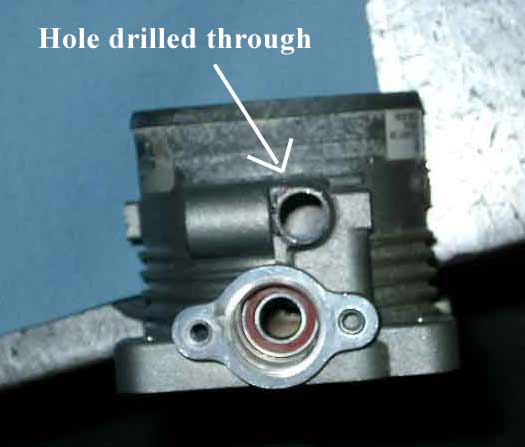
12) With the TPS removed you can now begin drilling and tapping some air passages. Center one of the pipe plugs on the round part of the throttle as shown below and draw a circle around it. Center punch or mark the middle of the circle. Drill a pilot hole with a 5/16 drill. Then drill it with a 7/16 drill all the way through into the throttle bore as shown in the fourth and fifth pics below. You must then drill out the hole that's shown in the sixth pic with the 7/16 drill as well. Using a 1/4 npt tap, tap both the holes. Put the black plug in the hole by the TPS sensor and the longer grey/silver plug in the other hole. Make sure to use red Loctite on the plugs. There is no need to over tighten these plugs, the Loctite will hold them in place forever.
13) Last but not least, if your brass throttle plate has a whole in it then you must close that hole. The best way would be to "braze" it shut. Not many people have that equipment, so I use solder. It will never come out and will not melt unless your car catches on fire. You cannot use a cheap soldering iron because it will not heat the plate up enough to make the solder stick. A propane torch will get the job done.
14) Before you start soldering, you want to scuff up the inside of the hole so it sticks really good. I use small round files or screwdriver tips to scratch up the inside of the hole in the plate. Once the hole is scuffed up, turn on the torch, heat up the plate and then apply solder till the hole is filled. Once the plate is cooled you can then file the solder flat on the plate and sandpaper and polish it if you want to make it pretty.
15) Install the modified TB
comments powered by Disqus