 Home
HomeAll Hacks
Zetec Engine
SPI Engine
General
Suspension
Interior
Exterior
In-Car-Entertainment
Detailing and Cleaning
Maintenance
Miscellaneous
Replacing front disc brake rotors and pads
Changing your brakes is not only necessary as part of your car's regular maintenance, but it's also easier than most people think. We'll cover changing the pads and the rotors on the front of the car.
Time Required:
1 Hour or less
Tools Needed:
Procedure:
Preparation:Park car on level surface, set parking brake, and make sure the keys are out of the ignition.
Brake Pad Removal:
1) Start with driver's side, set jack in place for lifting the driver's side front wheel (see owners manual) and raise jack until it touches the car. Do not lift the car car yet.
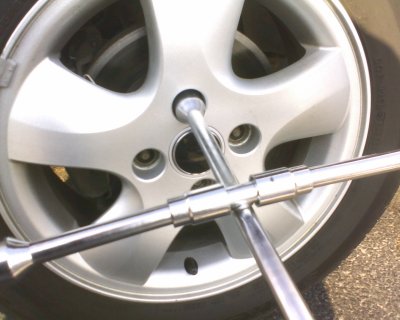
2) Loosen all lug nuts on driver's side front wheel 2 full turns.
3) Raise and support this corner of the vehicle.
4) Remove all lugnuts from this wheel.
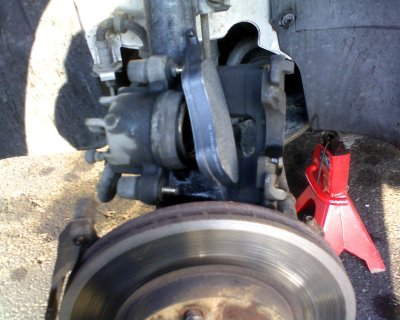
5) Remove this wheel from the hub.
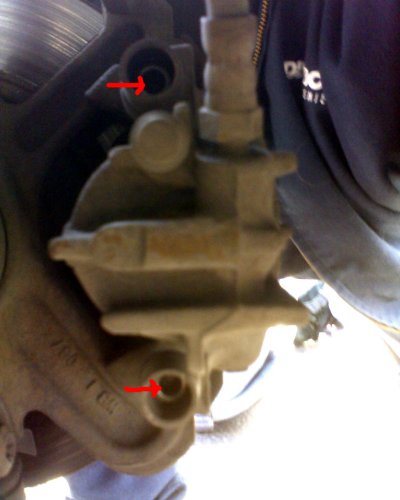
6) Behind the brake caliper, there are two rubber nubs sticking out. There are plastic caps stuck at the end of them. Remove these plastic caps.
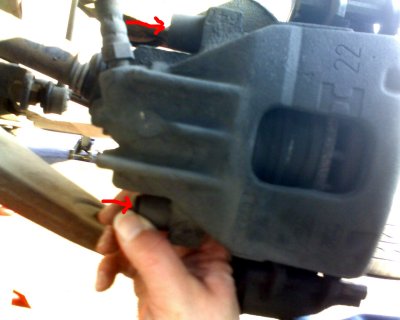
7) Within the rubber nubs are the caliper bolts. They are 7mm allen bolts or Torx T-45 Bolts. Remove them using a 7mm allen or T-45 socket on a ratchet. You may need to use a 3" Extension.
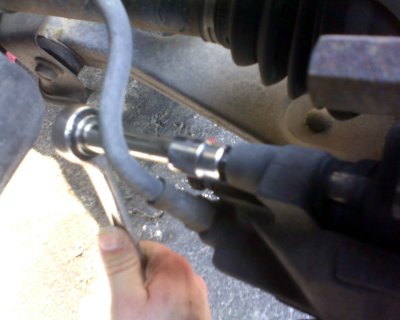
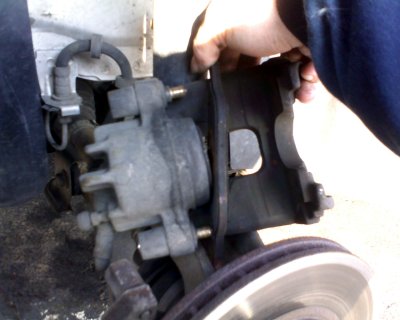
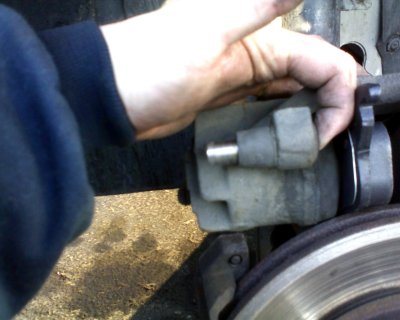
8) Carefully support the caliper as you remove the caliper bolts. If the caliper falls, it will be supported only by the brake line, and you can stretch, break, or damage the line by letting it hang from it.
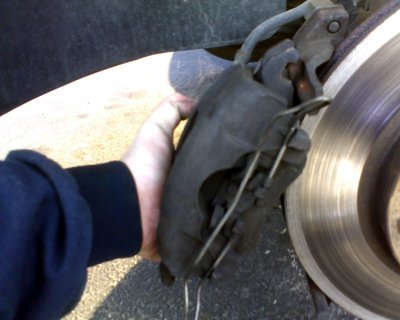
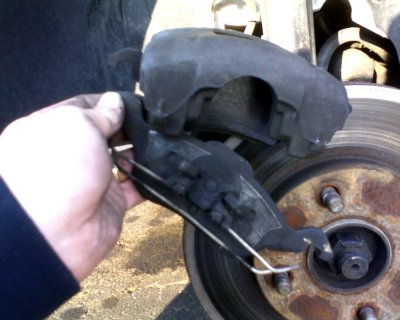
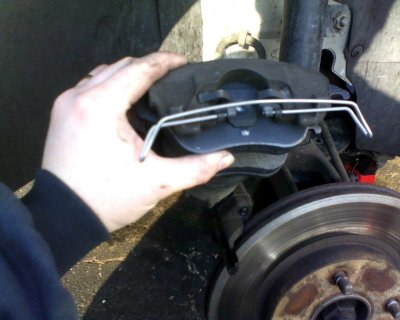
9) Take mental note how the metal wire clip is holding the outer brake pad to the caliper. Here is a diagram:
10) Using a prying device, snap the metal wire clip clear from the caliper, then slide the outer brake pad away from the caliper.
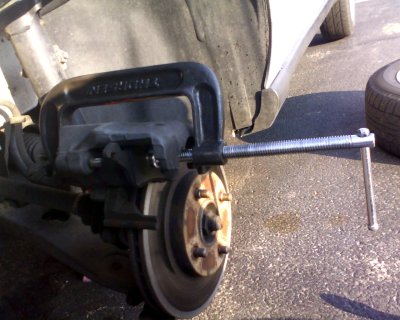
11) Using the large "C" Clamp, press the brake caliper piston back into the caliper housing, using the old inner brake pad to help you.
12) Pull the old inner pad out of the piston. It pulls straight out.
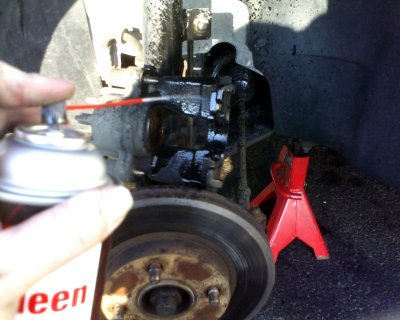
13) Optionally, you may wish to clean up some of the brake parts with brake cleaner.
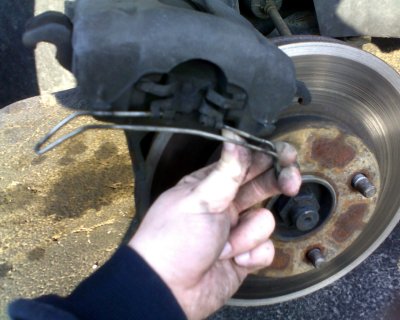
Brake Rotor removal:
Once caliper is removed, the brake rotor can be removed.
1) Pull brake rotor straight outwards
2) Apply force if needed. A rubber mallet works pretty well.
Brake Rotor installation:
1) Place rotor onto lug nuts.
2) Press firmly into place.
Brake Pad Installation:
1) Push metal clips from new inner pad into caliper piston
2) Slide new outer pad into caliper. Re-attach metal wire clip using the prying device
3) Press the caliper bolts out all the way. This will help you with re-installing the caliper
4) Align caliper, and slide the caliper bolts in. Rotate each bolt one or two turns to hold caliper in place, being sure not to cross-thread them.
5) Once caliper is aligned and bolts are threaded, tighten the bolts.
6) Replace wheel and lug nuts
7) Tighten lug nuts as best you can with wheel off the ground
8) Lower vehicle and properly torque all lug nuts for this wheel. Repeat on opposite side of vehicle.
comments powered by Disqus