 Home
HomeAll Hacks
Zetec Engine
SPI Engine
General
Suspension
Interior
Exterior
In-Car-Entertainment
Detailing and Cleaning
Maintenance
Miscellaneous
Installing LPE Rear Shock Mount Shims
These shims are designed to fill the air gap left in the factory Rear Shock Mounts, increasing the stiffness and effectiveness of your suspension.
Time Required:
Less than 30 minutes
Tools Needed:
Procedure:
Start by pulling up the bottom of the back seat and pushing the back of the rear seats forward. Also remove the hatch cover that lifts up with the hatchback. This will give you access to remove the trim inside the hatch.
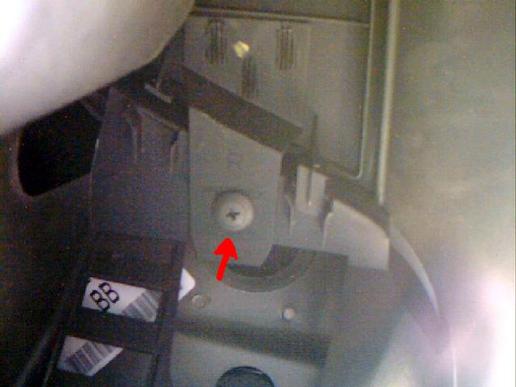
1) Remove the body-snap (plastic screw and anchor) from beneath the upper trim cover (where the seatbelt goes in)
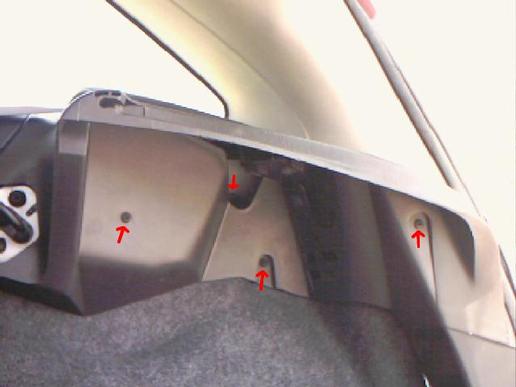
2) Remove the four (4) screws from the large plastic trim piece inside the hatch.
3) pull the hatch trim free from the body. There are two metal clips holding it in, one is behind the interior trim panel, and requires a little bit of force and care.
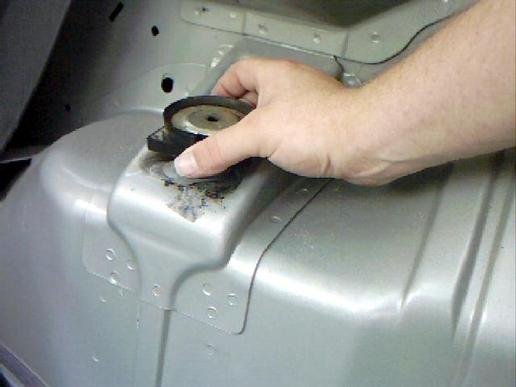
4) Pull back the felt-like hatch lining, it should pull out from behind the interior trim with no problems, simply fold it back to gain access to the interior body of the car. You will probably see a pad of noise-reducing material stuck over the shock mount:
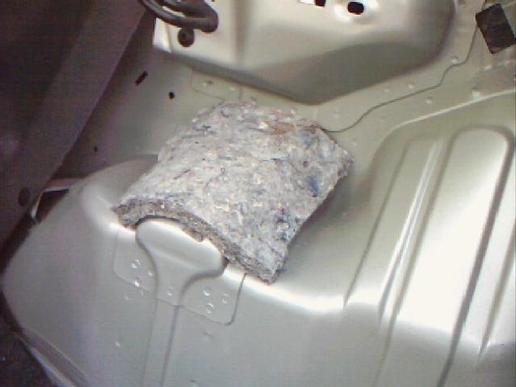
5) Carefully peel the noise-reducing pad away. You can actually discard it if you want, but I replaced it when I was done.
6) Latch on to the shock retaining nut with a 13mm wrench, then place a set of vise-grips or an adjustable crescent wrench on the end of the shock spindle.
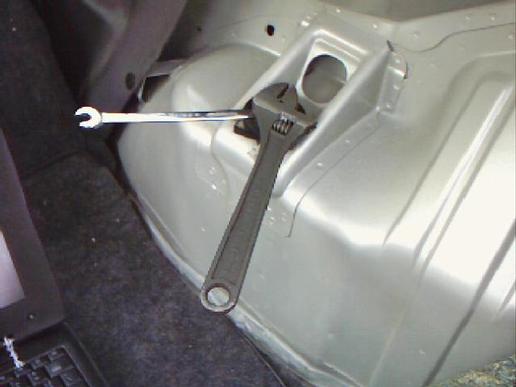
7) Hold the spindle still while turning the shock retaining nut counter-clockwise. Remove nut.
8) Remove rubber shock mount assembly
9) Pop out the metal disc inside the assembly by flexing the rubber part. Delrin Shim, rubber shock mount, and metal disc shown:
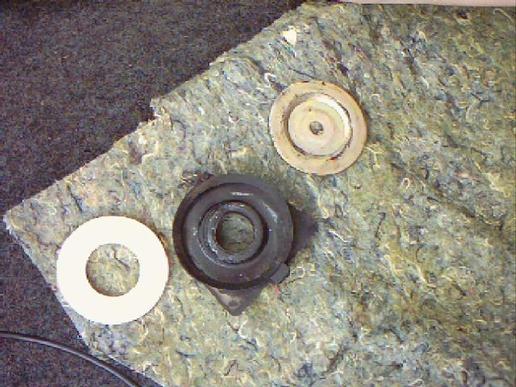
10) Place the delrin shim inside the rubber mount, making sure that the inner rubber part comes up through the hole in the middle of the shim properly.

11) Replace metal disc over the shim. Make sure the domed part of the metal disc is facing outwards.
12) Place the re-assembled shock mount back onto the shock spindle.
13) Replace the retaining nut and re-tighten it.
14) Replace the noise-reducing material, if desired.
15) Re-position the felt-like hatch lining
14) Replace the Hatch trim and four screws. Tighten the screws.
14) Replace the upper trim cover, and replace the body snap.
Repeat on other side.
comments powered by Disqus